
We love this beginner-friendly kimchi recipe! If you’ve been considering making kimchi, now is the perfect time to give it a go! I add it to almost everything!
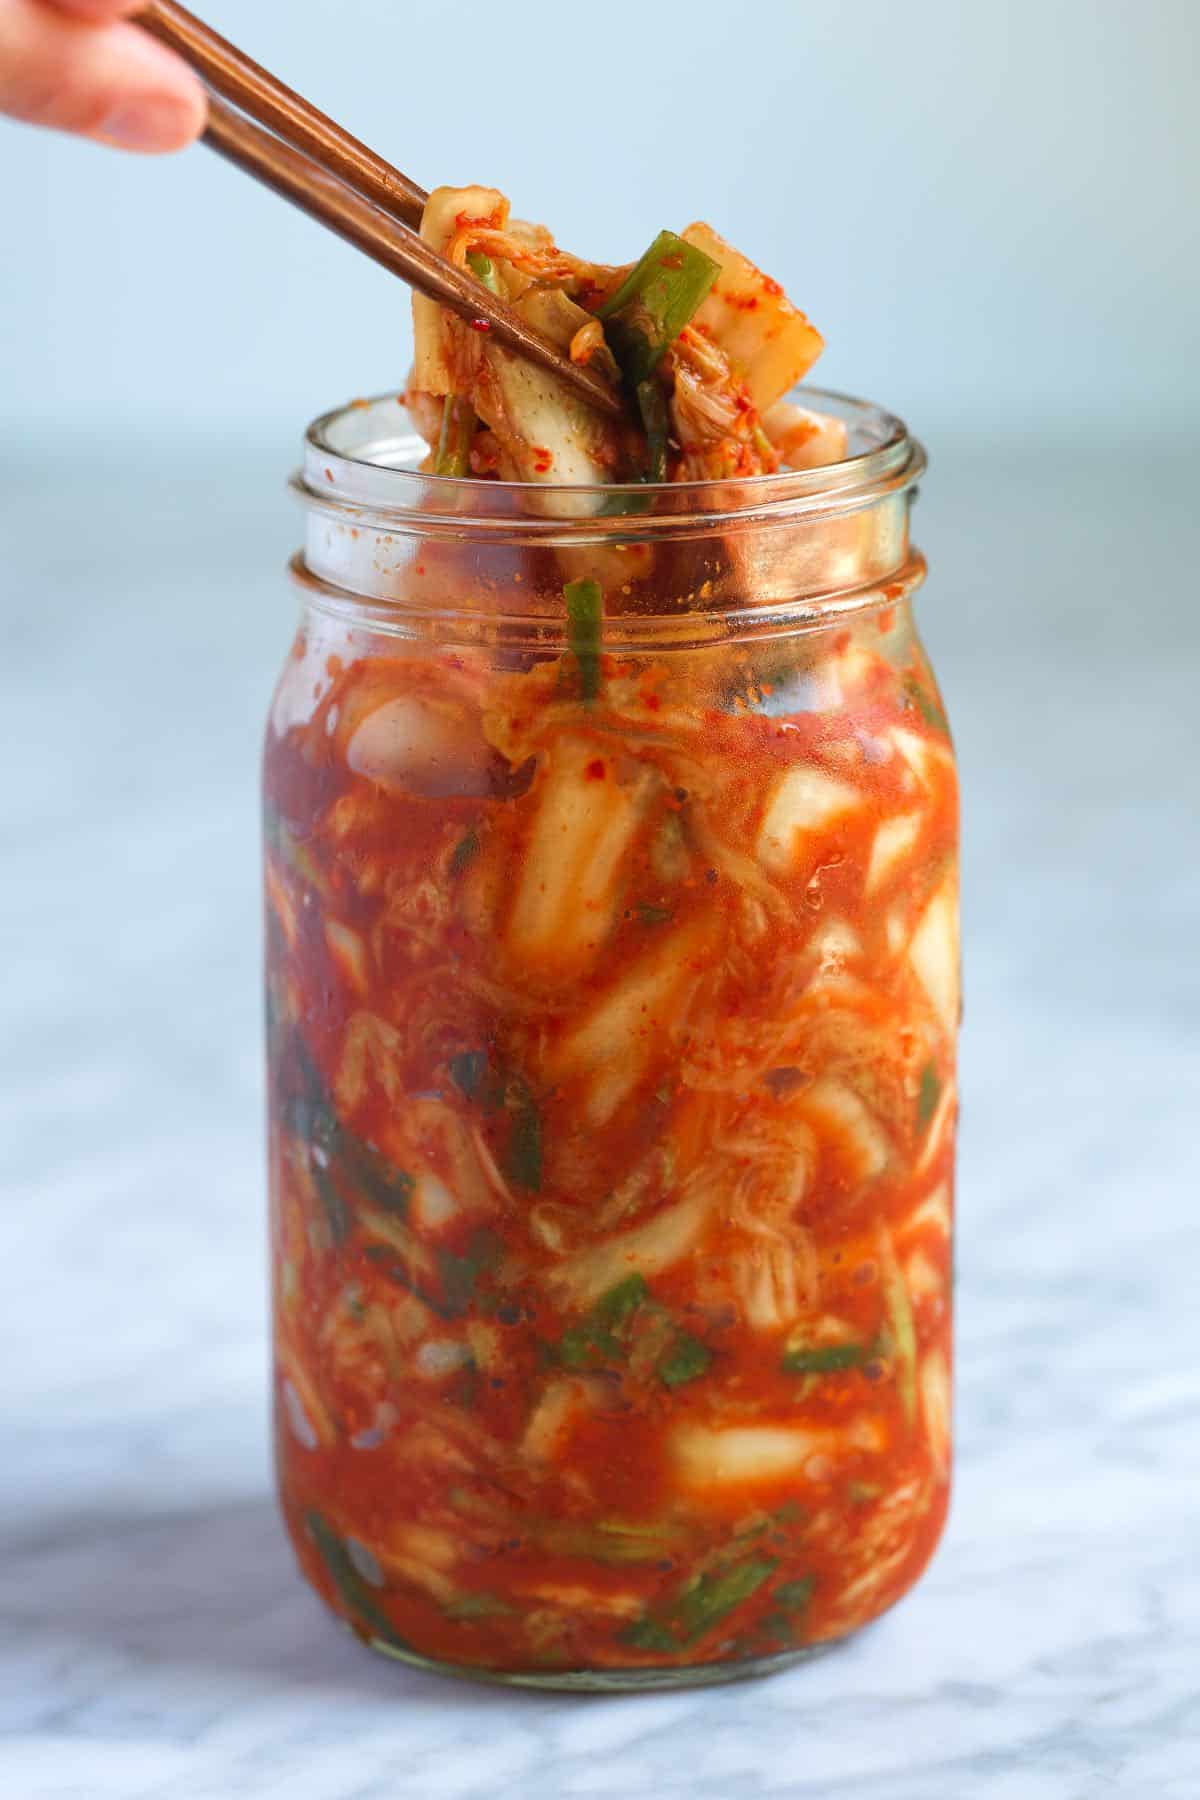
Kimchi, also spelled kimchee, is a beloved Korean dish made from fermented vegetables. I’m sharing our recipe for the most common variety of kimchi, which is made using napa cabbage (baechu). It is traditionally served as banchan (side dishes) next to other Korean dishes like beef bulgogi or Korean-style short ribs.
Kimchi is also used in kimchi fried rice, stews, dumplings, savory pancakes, and noodles. I also add it to sandwiches, wraps, and salad bowls. It really does go with just about everything! Currently, my favorite way to enjoy kimchi is with scrambled eggs!
Key Ingredients
- Cabbage: I use Napa cabbage to make kimchi because it has tender, delicate leaves that soften nicely during fermentation. Its mild flavor also complements the other delicious flavors in kimchi.
- Salt: The first step in making kimchi is to cut and salt the cabbage. The salt kills harmful bacteria and helps draw out excess water from the cabbage. After letting the cabbage sit with salt, I rinse and drain it until it’s mostly dry.
- Green Onions: I love adding green onions, or scallions, to kimchi. I cut them on the larger side so I can see them after fermentation. They add a fresh, oniony flavor and aroma.
- Gochugaru: This Korean red chili powder or flakes adds heat, flavor, and a vibrant red color to kimchi. I recommend using a mild gochugaru, as you can always add more to make your kimchi more vibrant without making it too spicy.
- Garlic and Ginger: I use a generous amount of fresh garlic and ginger in this recipe and like to grate them using a fine microplane grater. The grated garlic and ginger melt into the kimchi paste, adding incredible flavor.
- Fish Sauce: Kimchi often includes a seafood component like fish sauce, oysters, squid, or salted shrimp paste to add umami, a rich, savory flavor. We don’t often have most of what I listed, but I always have fish sauce, so I use that in this recipe.
- Sugar: Sugar balances the heat and spice from the gochugaru and seasons the cabbage.
- Rice Thickener: While optional, the rice thickener (a porridge of rice flour and water) helps the chili paste adhere to the cabbage. It also improves the flavor and texture of the kimchi. I’ve shared the simple steps to make it below.
Find the full recipe with measurements below.
Tips for Making Kimchi
One of the best parts about kimchi is that it’s delicious fresh (unfermented), or fermented. So you can make a batch, enjoy some as a salad, and leave the rest in a jar in your fridge to ferment.
Tip 1: Salt your cabbage. First, cut and salt the cabbage. This kills any bad bacteria and helps to draw out excess water from the cabbage. Then, after allowing the cabbage to sit with salt, we rinse and drain it until it’s mostly dry.
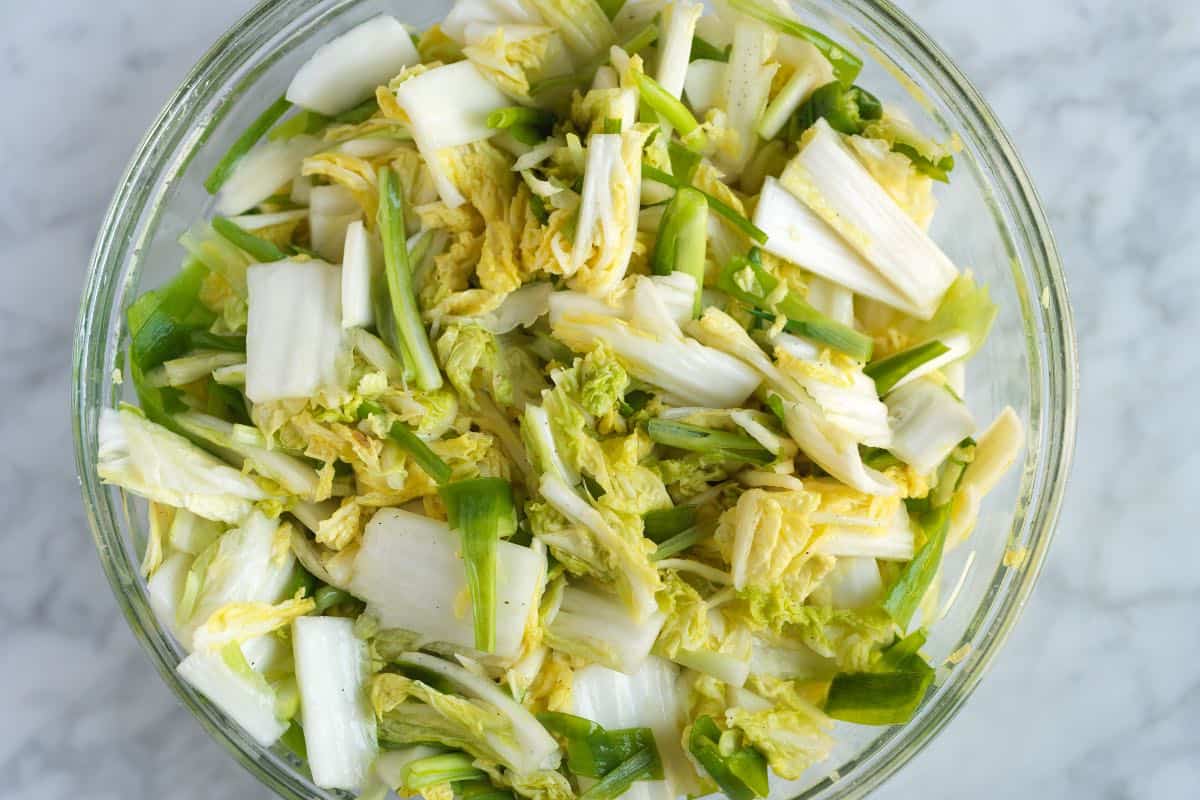
Tip 2: Adjust your spice level. Our kimchi recipe can also be adjusted to your preferred spice level, depending on how much gochugaru (red chili powder pictured below) you use. Gochugaru varies in how hot/spicy it is, so check the label. I like to use mild or medium for this recipe. Our recipe should make a medium spicy kimchi, but you can experiment with more spice as needed.
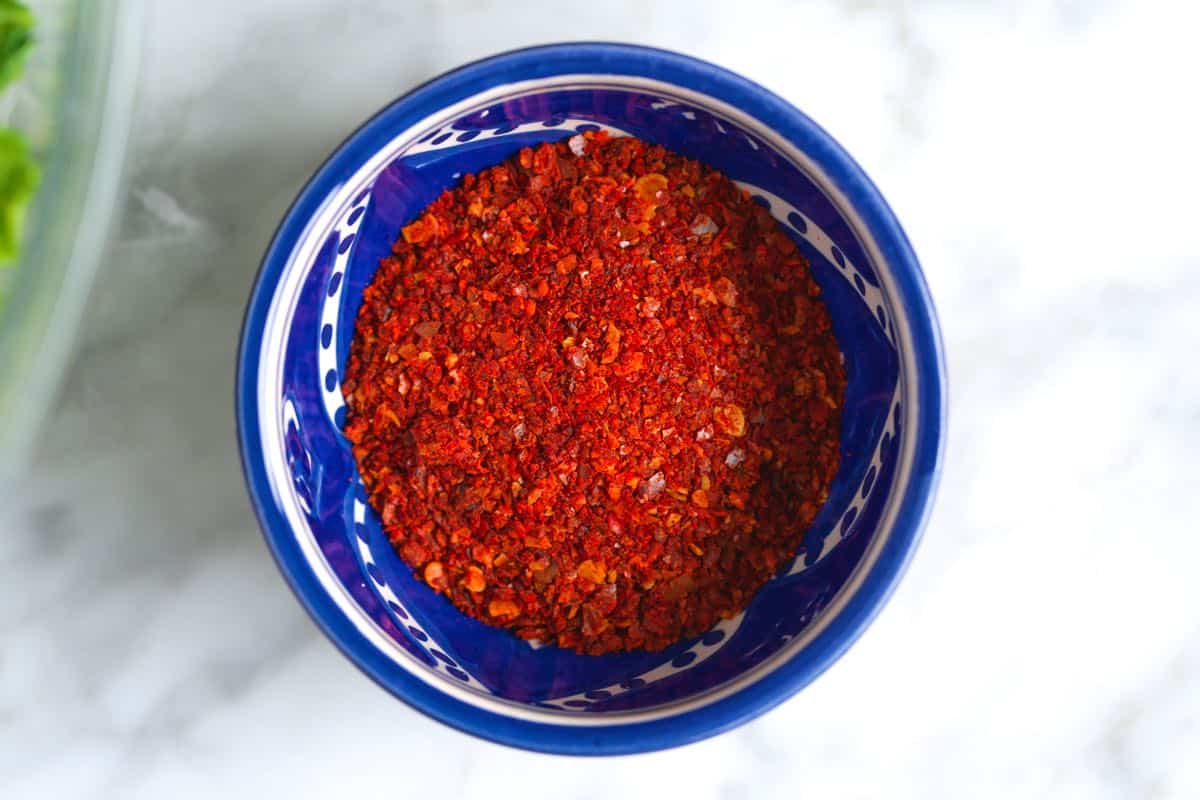
Tip 3: Massaging in flavor. Massage a paste made from red chili powder (gochugaru) and other ingredients like garlic, ginger, fish sauce, and sugar into the cabbage. You can enjoy the kimchi fresh (straight away) or allow it to ferment. Fermentation will happen at room temperature or in the fridge. This is a great time to take a few bites to test the spice level.
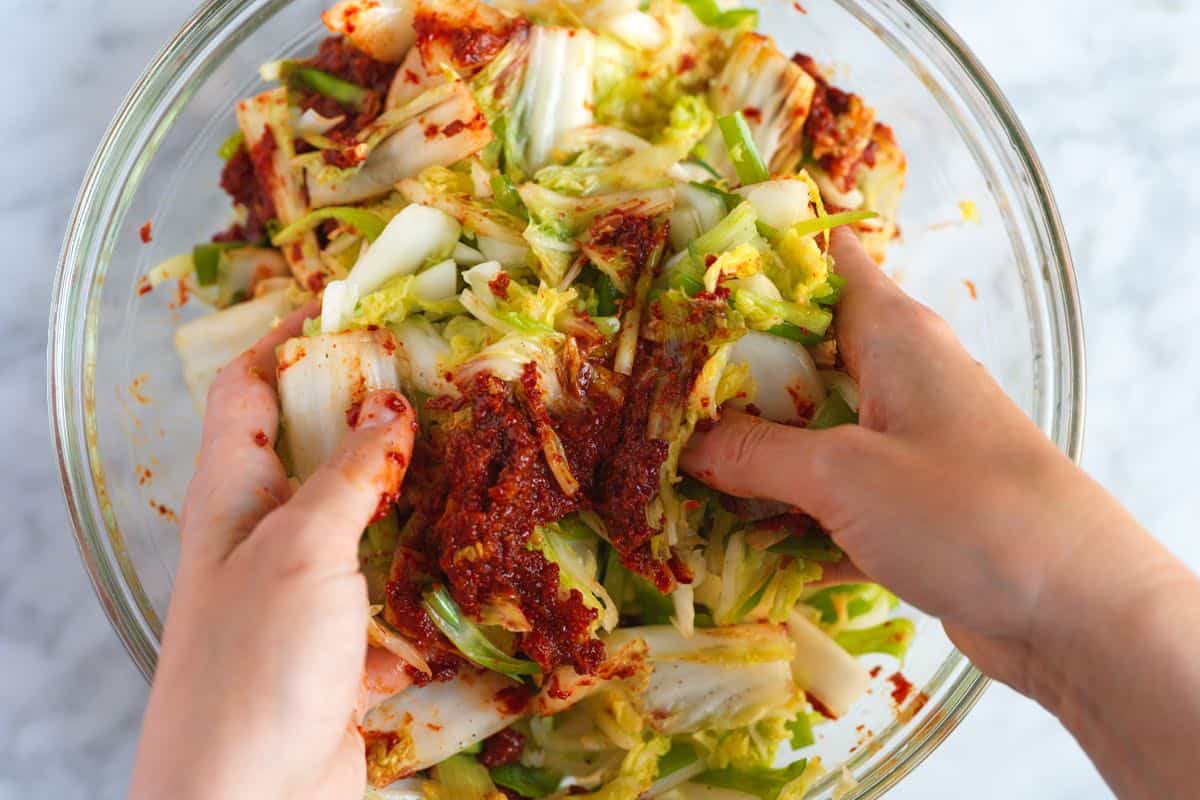
Tip 4: Controlling fermentation speed. The fermentation time for kimchi can vary depending on personal preference and the desired level of tanginess. Generally, fermentation takes 2 to 3 weeks in the fridge. Some people allow the kimchi to ferment at room temperature for a day or more. This speeds up your fermentation, but we prefer to simply slide our jar into the fridge and let it ferment there. It’s a little slower, but after a couple of weeks, the refrigerator-fermented kimchi has all the same sour, funky notes (it is hands-off and easy).
Tip 5: Storing your kimchi. Kimchi will stay fresh in the refrigerator for several months. However, its flavor and texture will change gradually over time. If you love fresher styles of kimchi, enjoy within a few weeks. For more well-aged kimchi with more sour, funky notes, leave it in the fridge for 3 to 4 weeks before enjoying. Please note that our recipe below is not intended to be shelf stable (do not can or leave unrefrigerated for an extended period).
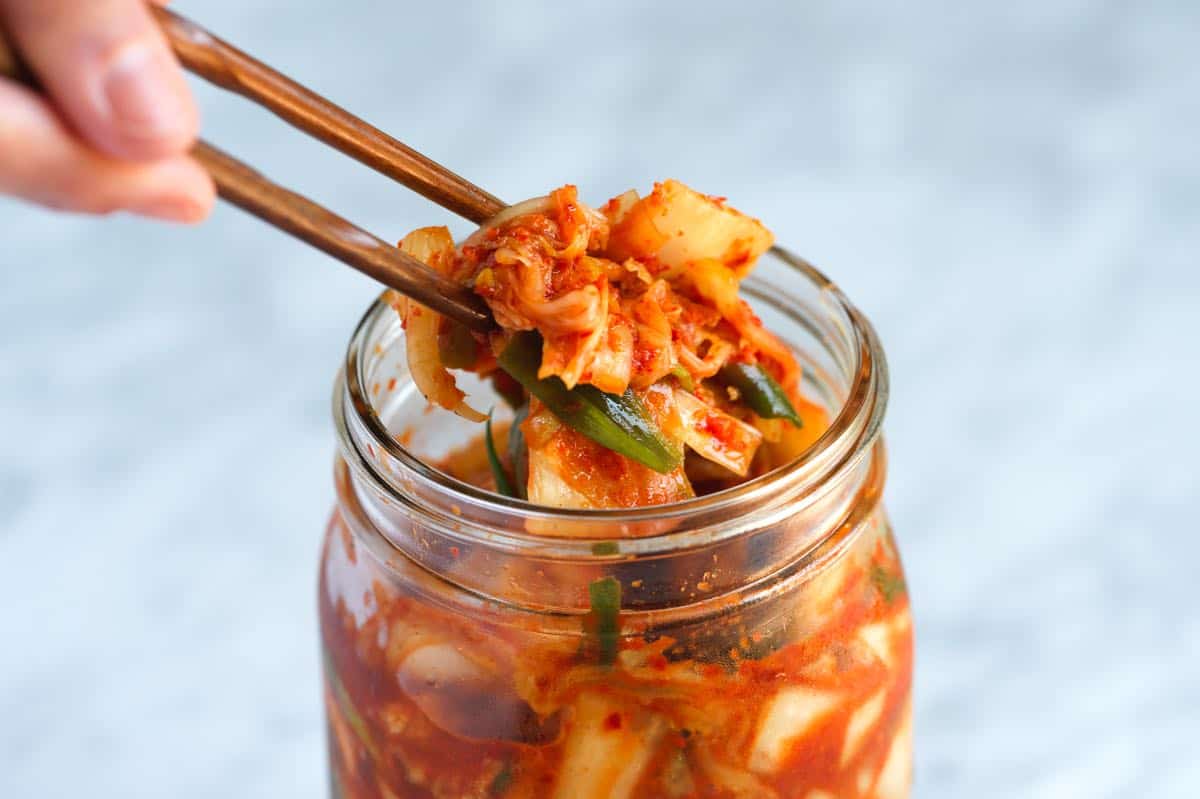
Easy Homemade Kimchi
- PREP
- TOTAL
Our kimchi recipe is beginner friendly. It’s straightforward and can be adjusted to your preferred spice level, depending on how much gochugaru (red chili powder) you use. While some recipes leave the cabbage in wedges, we chop ours into bite-size pieces. This simplifies things and saves a bit of time during the salt brine. We typically make cabbage-only kimchi and don’t add other vegetables (except garlic, ginger, and green onion), but feel free to add shredded Korean radish, daikon, or carrots.
Opinions on what makes the best kimchi are varied, and that’s okay. Kimchi is a traditional dish that’s had centuries to be tweaked from family to family. This recipe is our starting point. It calls for ingredients we typically have available in our area and makes the type of kimchi we crave.
You Will Need
Kimchi Ingredients1 napa cabbage, about 3 pounds
2 ½ tablespoons (42g) fine sea salt
12 green onions
2 tablespoons rice thickener, recipe below
5 tablespoons (45g) gochugaru, Korean red chili pepper powder
8 cloves garlic, finely grated
One 2-inch knob fresh ginger, finely grated
2 tablespoons fish sauce
4 teaspoons sugar
2 tablespoons water
Rice thickener1 tablespoon sweet rice flour
½ cup (118ml) cold water
Directions
1Prepare the cabbage by cutting it in half lengthwise, removing the core, and slicing it into 1 ½-inch pieces. Trim the root ends of the green onions, slice them in half lengthwise, and cut them into 2-inch pieces.
2Place the cabbage and green onions in a large bowl (or two bowls if needed). Sprinkle with salt and toss well to combine. Cover with a clean dish towel and let sit at room temperature until the cabbage wilts noticeably, about 1 to 2 hours. After 30 minutes, toss the cabbage to redistribute the salt.
3While the cabbage wilts, make the rice thickener by combining 1 tablespoon of rice flour and ½ cup of water in a small saucepan. Cook over medium heat, stirring constantly, until it forms a thick paste. Remove from heat and let cool.
4Make the chili paste by combining the gochugaru, garlic, ginger, fish sauce, sugar, and water. Add 2 tablespoons of the cooled rice thickener and stir until well blended. Store in the fridge until the cabbage is ready.
5Once the cabbage is wilted, rinse it well under cold water (2 to 3 times) and set it aside to drain for 20 to 30 minutes (or use a salad spinner).
Massage the chili paste into the drained cabbage (consider using gloves). Continue until all the cabbage is thoroughly coated.
6Pack the kimchi into a 1-quart jar (use a second jar or a smaller 16-ounce jar if you have extra). Press down on the kimchi until the brine covers the cabbage, leaving at least 1 inch of space between the kimchi and the lid. Place a fermentation weight on top if you have one, and seal the jar.
7Place the kimchi in the refrigerator to ferment. After a day, “burp” it by pressing down on the cabbage with a clean spoon to release trapped air bubbles
8Enjoy your kimchi at any point! It will develop funky, sour notes after a week or two. As it ferments, you might see bubbles forming and brine seeping out of the jar, so consider placing the jar inside a small bowl to catch anything.
Adam and Joanne's Tips
- Vegetarian or Vegan kimchi: Leave out the fish sauce and add 1 to 2 tablespoons of white or red miso paste to the chili powder mixture before massaging it into the cabbage.
- Salt: Use iodine-free salt. Iodine can prevent proper fermentation.
- Gochugaru: Korean red chili powder or flakes add heat, flavor, and vibrant red color to kimchi. We used Mother In Law’s Gochugaru in our photos since it is commonly available in local grocery stores. You can also find Gochugaru sold in International/Korean markets. If you have the choice between hot or mild, choose mild since you can add more and make your kimchi more vibrant without making it too spicy (tip from Maangchi).
- Spicy kimchi: Increase the gochugaru in the recipe or use gochugaru that’s labeled medium or hot to make your batch. You can taste the chili paste as you are making it to see if it is spicy.
- Nutrition facts: The nutrition facts provided below are estimates. We have used the USDA database to calculate approximate values. Note that sodium is difficult to determine with this recipe.











I’ve never even tried kimchi before but have wanted to. I have severe allergies so am fearful what might be in it. Making my own sounded fun. I’m just beginning my fermenting journey so I have lots to learn.
I just put my kimchi in the fridge to ferment. I pressed as hard as I could and it seems super merged for the most part but there might be a few tiny bits peaking out.
I have a weight and a pickle lid or whatever it’s called on it.
Will it be safe?
Hi Donna, You should be okay. Tomorrow, when you try it for the first time, you’ll make a bit of room and should be able to push the little bits not submerged down into the brine.
I just made this. I doubled the recipe to share. Thank you so much. I’m into fermenting everything. This is going to be so tasty. I did add daikon, and fermented ginger. I can hardly wait to eat this kimchi.
Love the additions! Enjoy your kimchi 🙂
Hi, I have a question: What is a fermenting weight, and where might I find one? Thank you for all of your amazing recipes!
Hi Tish, Fermenting weights are glass disks that you can place on the top of whatever you are fermenting that pushes everything down to make sure it stays below the brine. We found ours on Amazon. For this recipe, it isn’t required, just helpful if you happen to have one.
This turned out so yummy. I’ve never made kimchi before, but enjoy it at restaurants. I used primarily this recipe, but watched several YouTube videos to get the technique and an idea of proper texture and safe storage so I could be more confident. It’s been in my fridge in jars for 5 days and is coming along. I purchased all ingredients at my local Asian market, but the gochugaru was tricky, it was labeled “fine red pepper powder” and was from the brand Taste of Korea, so I just had to put two and two together, and look closely based on photos of the spices. I read that a good quality fish sauce is helpful, and there are so many to choose from. I used an inexpensive one and it turned out just fine, but next time I may experiment with a nicer fish sauce. I also added sesame seeds and thin matchstick carrots to my kimchi. I made about double the recipe and gave some to friends!
The most authentic and best flavored fish sauce is RED BOAT Fish sauce I have found – after much research and taste testing 🤓
It is the only fish sauce that is still made in the original/traditional way and the flavor proves it’s excellence 😊
I have a question. First attempt at Kimchi, BUT… I inadvertently used all of the thickener with the spices. Will my Kimchi be ok?
Hi there! You’re totally okay. Using all of the thickener with the spices won’t harm the kimchi. The thickener is there mostly to help the paste cling to the vegetables and to give the brine a slightly fuller, silkier texture as it ferments. It doesn’t affect the safety or the fermentation. Your kimchi may be a little thicker or the paste may cling a bit more than usual, but it will still ferment and develop flavor just fine.
Am a bit reluctant, because I have diabetes, high blood pressure, high cholesterol, Axonal neuropathy, Asthma, Shingles, Diverticuloses and am sure that I have forgotten a few things, Eat loads of fresh veggies, especially sauerkraut, Shout i just stick with that or could I possibly try making Kimchi????
This is The BEST recipe. Don’t be afraid…just do it! You won’t be disappointed.
Can you leave it on counter to ferment faster
Yes, you can leave it out on the counter to ferment faster. The key factors for fermentation are temperature and time. Leaving your kimchi at room temperature will significantly speed up the process compared to putting it directly in the fridge. Depending on how warm your kitchen is, it can take anywhere from a day to a few days for it to reach a tangy, bubbly stage. Just be sure to “burp” the jar daily to release built-up gas. Once it tastes right to you, move it to the refrigerator to slow down the fermentation and keep it at your preferred flavor.
You made us smile with this review! 🙂
Thank you for sharing your Kimchi recipe. I am interested in making my own homemade kimchi recipe instead of buying from the grocery store. I read a lot of the good benefits of fermented kimchi as brobiotic and that made me started to try kimchi. And Oh boy, I got hooked. Your recipe seems easy for a begginer like me so I gonna give it a try and hope it comes out good. Thanks again!
Hi, following instructions and there is a fair amount of excess rice thickener left. Is this correct??
Yes, you are correct. You can use it to thicken gravies, soups, and sauces. We tried to make the least amount as possible, but to get the smooth consistency, we needed a bit more than what is actually used to make the kimchi.
Afternoon. Can ask you to clarify step 5 on the simple kimchi recipe as it says make sure the brine is covering the cabbage but it makes no mention of adding or saving the brine? Thank you
Hi Christopher, there isn’t a brine that you add into the jar. As you press the cabbage mixture into the jar a natural brine is created. You want to make sure that the brine covers the cabbage at the time. (a fermentation weight or pushing the kimchi down should do the trick)
Just made this recipe last night but was worried that the result didn’t have a brine liquid on top. My experience with sauerkraut made me think it needed liquid on top to keep it from spoiling. So I added in the brine that was left after salting the cabbage. Now I’m worried that was a mistake. It was maybe 3/4 cup of liquid. Should I try and siphon it out?
Hi Joe, Hi there! No worries, your kimchi is still on the right track. With kimchi, the important part is that the cabbage stays pressed down so it’s covered by the brine. It doesn’t need to have a big layer of liquid sitting on top. In the recipe, we mention:
“Press down on the kimchi until the brine covers the cabbage, leaving about 1 inch of space at the top. If you have a fermentation weight, place it on top.” As long as the cabbage is submerged (or easily pressed down so it is), you’re all good. You don’t need to siphon out the extra brine you added. Just keep an eye to make sure the vegetables stay under the liquid, and press them down if they start to float (another reason I like those weights).
Best Kimchi recipe and instructions on the internet. Thank you.
Hi. I will be trying this recipe this coming week. I absolutely love kimshi. I will let you know how it turns out. Thanks for the recipe!!
We love this recipe and it is so easy 🙂
Can tapioca flour be substituted for rice flour? Here (in Guatemala) they sell Yuca flour for tapioca flour, but I can’t find rice flour.
Hello Suzy! Although we haven’t personally tried it, you should be able to substitute tapioca flour for the sweet rice flour in the kimchi recipe above. Generally, when substituting tapioca flour for rice flour, you will want to use half the amount.